7 Tips for Choosing the Best Drip Irrigation System

Choosing a drip irrigation system can seem simple until emitters clog, pressure drops, or tubing fails under strong sunlight. A small vegetable bed needs different coverage from a greenhouse or a row of young fruit trees. The best drip irrigation setup must match the plants, soil, water source, and available maintenance time. This guide introduces seven practical tips for making that decision with greater confidence. It considers flow rate, pressure regulation, filter quality, tubing size, emitter spacing, installation effort, and long-term durability. These details often matter more than attractive packaging.

Reliable selection begins with evidence. Manufacturer specifications can reveal operating pressure, discharge rate, UV resistance, and connector compatibility. Independent horticultural guidance can also help explain how those figures perform in real gardens. Still, product labels are not always complete. A system advertised as “easy” may require frequent flushing in hard water. That matters.

A careful evaluation should include the actual watering area. Measure each bed, note the plant spacing, and check the water pressure before buying. A pressure gauge and simple bucket test can expose problems early. The cheapest kit may save money today but create uneven watering later. I would not treat any single feature as decisive. Soil texture, seasonal weather, and user experience can change the result. Even an excellent system can fail when buried too deeply or left without filtration. These seven tips provide a practical framework, while leaving room to test, adjust, and rethink the setup as the garden develops.
7 Tips for Choosing the Best Drip Irrigation System

Define the Watering Area and Plant Requirements

Before choosing a drip irrigation system, define the exact watering area. Sketch each bed, row, container, and tree on paper. Measure their length and width. A 20-by-30-foot vegetable bed needs different coverage than six patio pots. Mark slopes, narrow corners, and nearby pathways. These details affect tubing routes and water distribution. Test the available water pressure with a simple gauge. Low pressure may require shorter zones. Small details matter.

Plant requirements should guide the layout. Leafy vegetables often need frequent, gentle watering. Established shrubs usually need fewer, deeper applications. Separate plants with similar needs into individual zones. Do not place drought-tolerant herbs beside moisture-loving lettuce without planning separate emitters. I once designed one mixed zone for both groups. The lettuce thrived, but the herbs developed weak, overly wet roots. That mistake was avoidable.

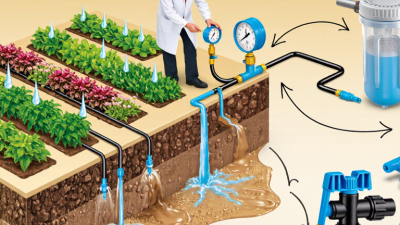
Check the soil before selecting emitter flow rates. Sandy soil drains quickly and may need closer emitters. Clay soil holds water longer and can become saturated. A practical starting point is one emitter near each small plant, with adjustments after observation. Run the system for several minutes, then inspect the soil below the surface. Dry spots suggest poor placement or clogged lines. Muddy areas indicate excessive flow or long watering periods. Keep notes during the first two weeks. Your original plan may need revision.

Measure Water Supply, Pressure, and Available Flow

7 Tips for Choosing the Best Drip Irrigation System

Measure your water supply before selecting components. Water demand is often guessed. According to the USGS Estimated Use of Water in the United States, irrigation used about 118 billion gallons daily in 2015, representing roughly 42% of national freshwater withdrawals. That scale makes small design errors costly. Turn on the intended zone, then fill a five-gallon bucket. If it fills in 30 seconds, available flow is approximately 10 gallons per minute. Repeat the test at different times. Well pumps and shared household lines can change the result.

Pressure needs equal attention. Use a pressure gauge while the zone is operating, not only when every tap is closed. Many drip layouts work within roughly 15–30 psi, but tubing, elevation, filters, and emitters create losses. The USDA Natural Resources Conservation Service Irrigation Guide recommends matching system design with measured flow, pressure, and elevation. Add a filter when the water contains visible sediment. A clogged filter can quietly reduce flow across the whole zone.

EPA WaterSense reports that outdoor water use can exceed 30% of household consumption, and dry climates may reach 60%. That makes uniform delivery more than a convenience. Keep the design below the measured maximum flow, perhaps by dividing long rows into zones. This is not perfect. Bucket tests ignore future pressure changes and seasonal demand. Still, a measured estimate is safer than choosing emitters by appearance. Check the farthest outlet during operation; weak discharge there usually reveals the real problem.

7 Tips for Choosing the Best Drip Irrigation System

Measure the water supply, operating pressure, and available flow before selecting dripline. A suitable system should keep the required zone flow below the available flow while maintaining adequate pressure.

The example measurements represent typical residential irrigation zones. Most drip systems operate effectively around 1.0–2.5 bar, but the exact requirement depends on the emitters, filtration, elevation, and pressure regulation used.

Choose Suitable Emitters, Tubing, and System Layout

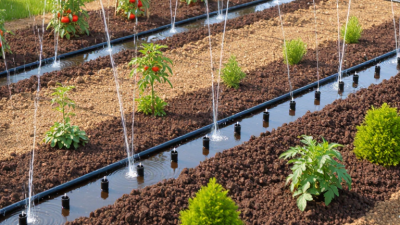
Choosing suitable emitters, tubing, and system layout determines whether drip irrigation remains dependable through changing weather. Match emitter flow to each plant’s needs. Vegetables often require lower, evenly spaced outlets, while young trees need several emitters around the root zone. Avoid placing one outlet directly against a trunk.

Check the pressure. A filter and pressure regulator protect small passages from clogging and excessive flow. I once installed emitters without checking pressure differences between beds. The nearest plants received too much water, while distant plants stayed dry. That mistake was preventable. Use pressure-compensating emitters when the garden slopes or the tubing runs far.

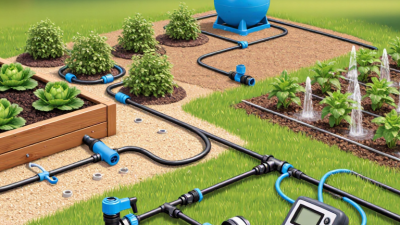
Tubing should fit the area, not merely the budget. Main lines need enough diameter to maintain steady pressure, while branch lines can be smaller. Keep runs reasonably short, and cap unused openings securely. Small details matter. Lay tubing along planting rows with gentle curves, avoiding sharp bends and exposed sections that may shift in sunlight.

Flush the lines before installing emitters, then test every zone for several minutes. Watch for weak flow, leaks, and pooled water.

A simple layout is easier to inspect and repair. Separate plants with different watering needs into independent zones. Soil type can change the result; sandy soil may need closer emitters, while clay soil requires slower application. Manufacturer charts are useful, but actual site testing remains essential. Conditions rarely match the diagram perfectly.

Compare Automation, Filtration, and Maintenance Features

7 Tips for Choosing the Best Drip Irrigation System

Compare automation before chasing advanced features. Choose a controller with seasonal scheduling, rain sensing, and a clear manual override. Add soil-moisture sensors where beds dry unevenly. They prevent watering by habit. The U.S. Environmental Protection Agency reports that outdoor irrigation uses over 9 billion gallons daily in the United States. It also estimates that evaporation and runoff can waste nearly half of that water. Automation must respond to real soil conditions, not just a calendar.

Filtration deserves equal attention. Select a filter that matches your water source, flow rate, and emitter requirements. Check pressure regulation too. Excess pressure can damage tubing and create uneven discharge. ISO 9261 defines performance and testing requirements for agricultural emitters and emitting pipes. Use it as a technical reference when comparing specifications. A practical test is simple: measure flow at the first and last emitters. Noticeable differences signal a design or pressure problem.

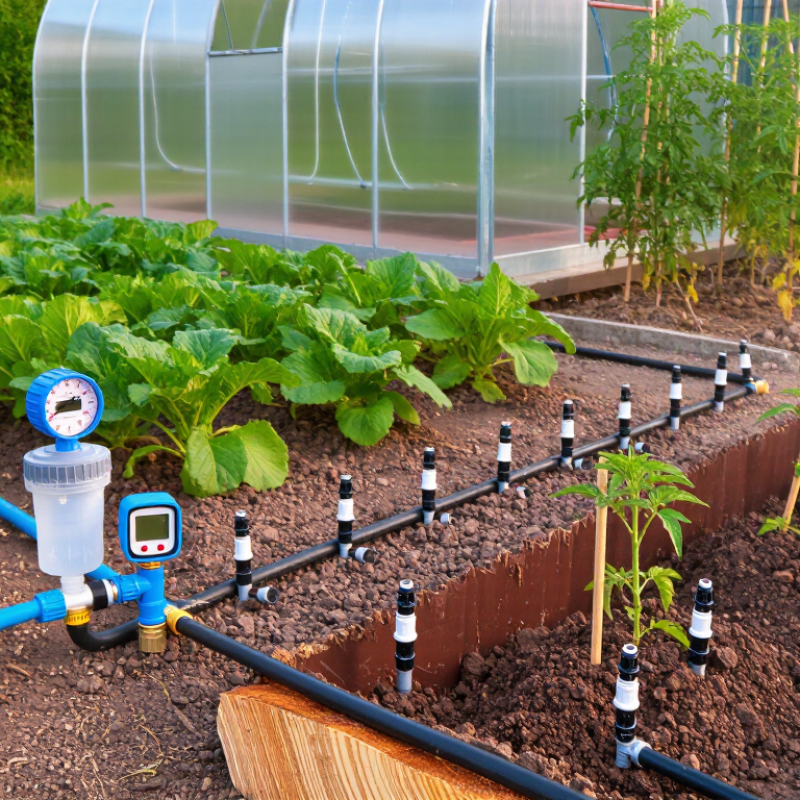
Maintenance separates reliable systems from expensive garden clutter. Choose filters with visible pressure gauges and easy-clean screens. Install flush valves at line ends. Inspect clogged emitters, cracked connectors, and folded tubing each month. Keep a short service log. It may reveal patterns that memory misses. FAO AQUASTAT estimates agriculture accounts for about 70 percent of global freshwater withdrawals, so small inefficiencies matter. Perfect schedules rarely exist. A system that is easy to inspect will usually outperform a smarter system left untouched.

7 Tips for Choosing the Best Drip Irrigation System - Compare Automation, Filtration, and Maintenance Features

Tip Selection Factor What to Compare Recommended Standard Why It Matters
1 Match the emitter flow rate Emitter output, plant spacing, soil type, and irrigation duration Use lower-flow emitters for clay or compact soil; use higher-flow emitters only when drainage and infiltration can handle them A suitable flow rate reduces runoff, ponding, and uneven wetting
2 Choose the right level of automation Manual timer, programmable controller, soil-moisture sensor, rain sensor, and remote access Use a programmable controller for routine schedules; add sensors when weather or soil moisture varies significantly Automation improves scheduling consistency and can reduce unnecessary watering
3 Prioritize filtration Screen or disc filter, filter rating, cleanable element, and compatibility with the water source Select filtration according to emitter manufacturer requirements and water quality; surface water generally needs more protection than clean municipal water Filtration prevents sediment and organic matter from clogging small emitter passages
4 Verify pressure regulation Regulator, pressure gauge, pressure-compensating emitters, and system operating range Install a regulator and gauge when supply pressure may exceed the tubing or emitter rating Stable pressure helps maintain more uniform flow and protects components from excessive pressure
5 Evaluate zone design Tubing length, elevation changes, valve layout, crop water needs, and available flow Separate areas with different water requirements or elevation into independent zones Proper zoning prevents low-flow areas and allows schedules to match plant needs
6 Compare maintenance requirements Filter cleaning, line flushing, leak inspection, clog detection, and replacement parts Choose systems with accessible filters, flushable line ends, visible pressure readings, and readily available fittings Simple maintenance reduces downtime and helps preserve uniform water distribution
7 Plan for expansion and durability UV resistance, material thickness, seasonal storage, additional zones, and repairability Use outdoor-rated tubing and fittings, cap unused outlets, and leave capacity for future zones A scalable system lowers future installation costs and extends service life

Feature Comparison by System Configuration

System Configuration Automation Level Filtration Need Maintenance Demand Best-Fit Application
Basic manual kit Low Screen filter recommended Moderate Small gardens, containers, and areas with consistent water pressure
Timer-controlled system Medium Screen or disc filter Moderate Residential beds and landscapes requiring repeatable watering schedules
Multi-zone automated system High Filter matched to water quality Moderate to high Large gardens, mixed plantings, and sites with different irrigation zones
Sensor-assisted system High Filter plus regular inspection High Water-sensitive landscapes and sites affected by changing rainfall or soil moisture
Commercial-scale zoned system High Water-source-specific filtration High Agricultural blocks, nurseries, and larger installations requiring monitoring and scheduled flushing

Evaluate Installation Costs, Durability, and Expandability

7 Tips for Choosing the Best Drip Irrigation System

Installation cost is more than tubing and emitters. Ask for separate prices for trenching, filters, pressure regulators, valves, labor, and controller programming. A small garden may need only a simple manifold. Larger plots require zoned lines and stronger main pipes. FAO’s AQUASTAT data shows agriculture accounts for roughly 70% of global freshwater withdrawals. Efficient design matters. EPA WaterSense reports that microirrigation can use 20–50% less water than conventional spray systems when installed correctly. Not every installation achieves that result.

Durability begins with water quality. Fine sediment can clog emitters within weeks. Choose a washable filter, visible pressure gauge, and accessible flushing points. UV-resistant tubing helps, especially where lines sit above dark soil. USDA NRCS Conservation Practice Standard 441 commonly uses an emission-uniformity target of at least 85%. That figure is useful, but field performance still depends on pressure and maintenance. I once underestimated filter-cleaning time. That mistake made the cheapest system expensive.

Expansion should be planned before digging. Leave spare manifold outlets and size the mainline for additional zones. Check the pump’s flow rate after existing demand is calculated. A system that barely works today may fail when another greenhouse is added. Use replaceable emitters instead of permanently sealed sections. Keep a simple zone map near the controller. It seems unnecessary. During repairs, it saves time. Allow room for imperfect decisions; gardens change faster than drawings.