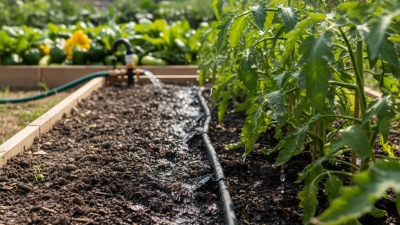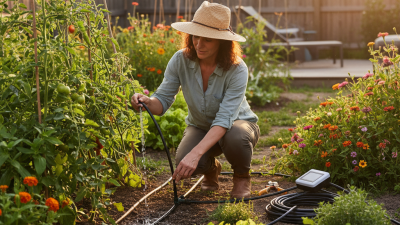
Choosing a garden drip irrigation system in 2026 is less about buying the newest kit and more about delivering water where roots can use it. The U.S. Environmental Protection Agency’s WaterSense guidance says outdoor watering can account for nearly 30% of household water use in the United States. It also warns that inefficient irrigation can waste substantial amounts through evaporation, runoff, and overwatering. Small leaks matter.
Drip systems apply water slowly through tubing, emitters, or porous lines near plants. That can be useful around raised beds, shrubs, and closely spaced vegetables, especially when wind or heat makes overhead watering less effective. The USDA Natural Resources Conservation Service stresses that irrigation choices should fit the soil, crop, and site. In practice, a sandy bed may need different emitter spacing and watering intervals than dense clay. There is no single setup for every garden.
This guide compares leading system types and evaluates practical details: filtration, pressure regulation, tubing quality, expandability, timer controls, and replacement-part availability. Those details can decide whether a kit keeps working after a dry summer—or clogs halfway through one. We will distinguish simple starter kits from more adjustable systems, while treating advertised savings cautiously. A drip line is not automatically efficient if it runs too long or misses the roots. That part takes attention. EPA and USDA guidance provides a sound starting point, but local soil and weather still deserve the final say.
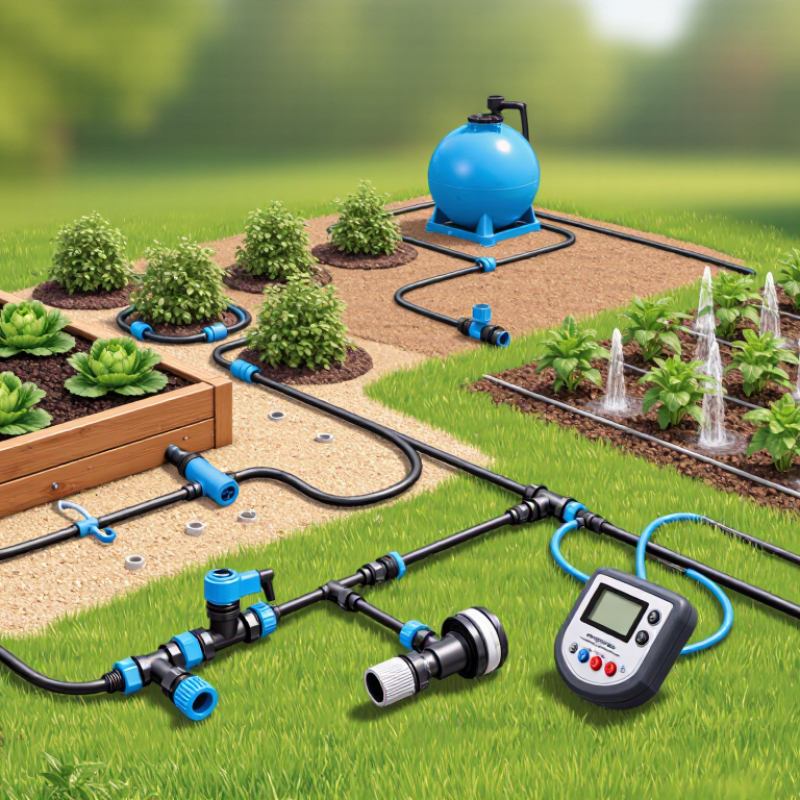
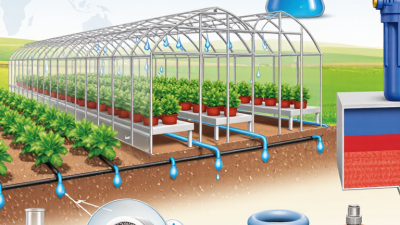
A garden drip irrigation system delivers water through narrow tubing and small emitters placed near plant roots. A timer may open a valve, while a pressure regulator keeps water flow gentle. Without steady pressure, some emitters can release too much water and others too little. A filter catches grit that could clog the tiny openings. The parts are simple, but their placement matters.
When water moves through the main tubing, emitters release it slowly into the soil. This gives roots time to absorb moisture and can reduce water landing on leaves or bare paths. It does not guarantee less water use; leaks, poor layout, or long run times can waste plenty. Check the soil a few inches down after watering. Dry soil may call for a longer cycle, while soggy soil suggests shortening it. Different beds may need different schedules.
Tips: Put emitters near, not against, plant stems. Flush the tubing before connecting emitters, and inspect the filter during the growing season. On sloped beds, test the upper and lower plants; flow can vary. I would not trust a timer alone. A quick soil check catches problems that schedules miss, though it takes a little patience.
A reliable garden drip irrigation system starts with a few practical parts: a water connection, filter, pressure regulator, tubing, and emitters. The filter catches grit that could block narrow openings. The regulator lowers household pressure to a level suited to the tubing and fittings. Check the system’s stated pressure range; one setting does not suit every layout.
Mainline tubing carries water along beds, while smaller microtubing can direct it to individual pots or plants. Emitters release measured amounts near roots, but their flow rates vary. Place them near the root zone, not against stems, and inspect the soil after watering. Small details matter.
System types serve different gardens. Inline dripline has built-in outlets spaced along the tube, making it useful for vegetable rows and long planting beds. Point-source systems use separate emitters, offering more control around shrubs or containers. Soaker hoses seep water along their length and can be simple to arrange, though coverage may vary with pressure and hose placement. Gravity-fed setups can work where water pressure is limited, but elevation and flow need careful checking. Some layouts look tidy on paper and still leave dry patches. Run the system, observe the soil, and adjust emitter spacing or run time as plants grow.
Typical application-efficiency ranges by irrigation method
Drip and micro-irrigation systems typically apply water more efficiently by delivering it near plant roots. Common garden setups use a filter, pressure regulator, mainline tubing, and emitters or dripline. Actual efficiency depends on design, maintenance, soil, and installation.
Evaluating a garden drip system in 2026 starts with matching its output to the garden, not its advertised coverage. A long vegetable bed, a row of pots, and a young fruit tree need different flow rates. Check whether the kit lists emitter output in gallons per hour and supports separate watering zones. Small detail. It matters.
Look closely at pressure control and filtration. Household water pressure can vary, while tiny emitter openings may clog when grit enters the line. A filter and pressure regulator should be accessible, replaceable, and compatible with the tubing diameter. Check that connectors hold firmly after repeated installation, especially in direct sun. A system requiring unusual fittings may become frustrating when one elbow cracks. Easy to overlook.
Compare layout flexibility, spare-part availability, and maintenance instructions. Emitters should be easy to flush or replace, and tubing should bend around beds without kinking. Test water distribution by placing cups beneath several emitters for the same length of time. Large differences can point to pressure, blockage, or layout problems. Do not rely on “water-saving” language alone. Gardens change as roots grow and seasons shift, so leave room for adjustment. That part is often missed.
Choosing a drip system starts with the garden, not a product list. Measure each bed and note where plants sit. A short row of tomatoes may need simple tubing with regularly spaced emitters. Mixed vegetables often need adjustable outlets, since seedlings and mature plants use different amounts of water. Small beds are different.
Check your water source before buying components. Low pressure, long tubing, or a sloped yard can cause uneven flow. A filter helps prevent grit from clogging narrow outlets, while a pressure regulator can protect tubing. For pots on a sunny patio, choose lines that reach each container without awkward loops. That matters.
Think about how you will actually use the system. A timer can help during busy weeks, but it cannot tell whether soil is already wet after rain. Test the setup for several minutes, then feel the soil near the roots—not just the surface. If one corner stays dry, adjust the layout or emitter spacing. I would avoid installing a complicated network all at once; it is easy to overlook a leak beneath mulch. Start with one bed, observe it through a few watering cycles, and expand only when the coverage feels consistent.
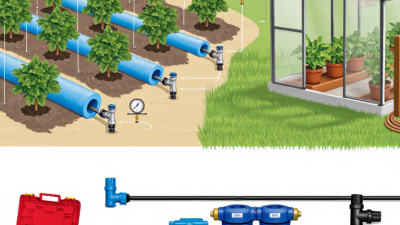
A reliable garden drip system starts with a simple site check. Note each bed’s length, plant spacing, and water source before buying tubing or emitters. Choose a layout that reaches every root zone without long, tangled runs. Install a filter and pressure regulator near the supply; fine debris and excess pressure can clog or damage small outlets. Add a timer only if it suits your schedule and water needs. Keep it simple.
Lay the main tubing along the beds, then punch emitter holes beside—not directly against—plant stems. Secure loose lines with stakes and cap open ends. Turn the water on briefly to flush the tubing before attaching end caps. Test the system while it runs. Look for leaks, dry patches, and uneven drips; a small cup beneath several emitters can reveal differences in flow. Adjust placement as plants grow, and water deeply enough to reach the root zone rather than following a fixed timer blindly. That part takes judgment.
Clean the filter regularly, especially if water carries sediment. Check emitters for clogs and inspect tubing for sun damage or accidental cuts. Before freezing weather, drain the lines and store removable parts indoors. I would not assume a well-installed system needs no attention; a blocked emitter can quietly leave one plant thirsty. Recheck after the first week.
| System type | Best suited to | Typical components | Installation basics | Operation guidance | Maintenance and limitations |
|---|---|---|---|---|---|
| Inline-emitter drip tubing | Vegetable beds, rows of similar plants, and hedges with consistent spacing. | Supply line, tubing with built-in emitters, filter, pressure regulator, fittings, and end closure. | Lay tubing along plant rows and position emitters near the root zone. Select emitter spacing and flow rate to suit plant spacing and soil; secure the tubing and flush it before closing the ends. | Use the pressure specified for the tubing. Run long enough to moisten the root zone without prolonged runoff; adjust schedules for rainfall, temperature, and soil type. | Flush lines periodically and inspect for leaks, clogged emitters, and displacement. Built-in emitter spacing may not suit plants with widely different water needs. |
| Blank tubing with point-source emitters | Mixed planting beds, containers, and shrubs with varied water requirements. | Blank tubing, separate emitters, filter, pressure regulator, punch tool, connectors, and end caps. | Route tubing near each plant and install emitters where water can reach the root area. Choose emitter flow rates and quantities based on plant size, soil, and the emitter instructions. | Check that each emitter delivers water consistently. Larger plants may need more than one emitter; avoid placing emitters against stems or trunks. | Remove or replace clogged emitters as needed and flush the tubing. Individual emitters offer flexibility but add connection points that can leak or come loose. |
| Drip tape | Seasonal vegetable rows and relatively uniform, closely spaced crops. | Thin-walled drip tape, filter, pressure regulator, mainline or header, tape connectors, and end closures. | Install along crop rows with the emitter outlets oriented as directed. Use compatible fittings and operate within the tape’s specified pressure and flow limits. | Apply water in shorter, monitored runs where needed to limit ponding or runoff. Check that water reaches the full length of each row. | Thin tape can be punctured, crushed, or damaged by tools and animals. Flush lines, inspect for leaks, and store or replace seasonal tape according to its condition. |
| Micro-sprayer or micro-sprinkler system | Ground covers, closely spaced plants, and beds where a small wetted area around each outlet is useful. | Supply tubing, micro-sprayers or micro-sprinklers, stakes or risers, filter, pressure regulator, and connectors. | Place outlets to provide appropriate coverage without spraying paths, walls, or foliage unnecessarily. Check spacing and spray patterns after installation. | Use the pressure and spacing specified for the selected outlets. Wind can affect coverage, so inspect the wetted pattern during operation. | Clean blocked nozzles and check for shifted or damaged heads. Compared with drip emitters, sprays can lose more water to wind or evaporation and may wet foliage. |
| Container drip system | Patio pots, planters, and small container collections. | Supply tubing, small distribution lines, emitters or drippers, stakes, filter, pressure regulator, and a timer if desired. | Route a line to each container and secure the outlet near the potting mix. Match emitter output to pot size, plant demand, and drainage; test every pot before relying on the system. | Containers can dry out faster than in-ground beds. Check moisture and drainage regularly, especially during hot or windy weather. | Inspect small lines for kinks and emitters for clogging. Plant growth, pot changes, and blocked drainage can alter water needs, so reassess outlet placement and run time. |
General guidance: requirements vary by product, water source, elevation, soil, and garden layout. Follow the system manufacturer’s pressure, filtration, spacing, and flow specifications. Use a filter and pressure regulator when required, and check local watering restrictions.