How to Set Up a DIY Irrigation System?

A healthy garden needs more than regular watering. It needs water delivered at the right time, in the right amount, and close to each plant’s roots. A diy irrigation system can make this process simpler, especially for raised beds, containers, and small lawns. This guide explains how to plan, assemble, test, and maintain a practical system using common tools and readily available parts.

Good results begin with observation. Walk through the garden in the morning. Notice dry corners, compacted soil, and plants with different moisture needs. Measure the hose distance before buying tubing. Check your water pressure, because weak pressure can leave distant emitters nearly dry. Drip lines, filters, pressure regulators, connectors, and a timer each serve a specific purpose. Reliable irrigation guidance also recommends preventing backflow and following local water-use requirements. These details protect both your plants and your household plumbing.

Expect some adjustment. My first layout would have used too many emitters in one bed, reducing flow near the end. A short test would have revealed that mistake earlier. Run the system for several minutes, then touch the soil beneath each emitter. Look for puddles, blocked outlets, loose joints, or uneven coverage. Small leaks are easy to miss. Keep notes about watering duration and weather conditions. Plants respond differently during cool weeks, heat waves, and rainy periods. A timer is helpful, but it should not replace regular inspection. diy irrigation works best as a monitored system, not a set-and-forget solution.
How to Set Up a DIY Irrigation System?

Assess Water Demand: Plan for the Standard 1-Inch Weekly Target

How to Set Up a DIY Irrigation System?

Assess Water Demand: Plan for the Standard 1-Inch Weekly Target

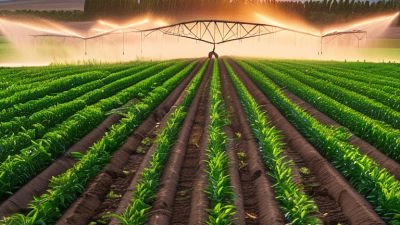
A practical starting point is one inch of water each week, including rainfall. The U.S. Environmental Protection Agency’s WaterSense guidance uses this figure for many established lawns and landscapes. It is a planning target, not a fixed rule. Sandy soil may drain quickly, while clay soil can hold water near the surface. Watch the ground.

Measure output before installing every line. Place straight-sided cans around the watering area, then run the system for 15 minutes. If the average depth is one-quarter inch, four similar cycles provide roughly one inch weekly. The Irrigation Association recommends checking distribution uniformity because some zones receive far more water than others. A dry corner often reveals a poor layout, not thirsty plants.

Weather must change the schedule. FAO Irrigation and Drainage Paper 56 explains that crop water use depends on reference evapotranspiration and plant coefficients. In hot, windy weather, demand rises. During cool, rainy weeks, irrigation may be unnecessary. I once treated the one-inch target as a weekly command and overwatered shaded soil. That mistake encouraged shallow roots. A soil probe, simple rain gauge, and occasional hand checks provide better evidence than a timer alone. Water slowly until the soil is moist several inches deep, then pause and inspect.

Choose Efficient Components: Drip Irrigation Reaches 90–95% Efficiency

How to Set Up a DIY Irrigation System?

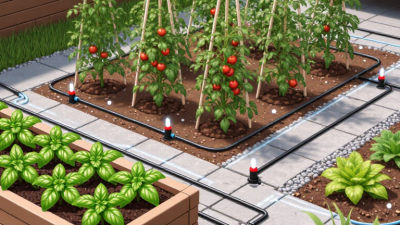
A DIY irrigation system works best when water reaches the root zone, not the leaves. Drip irrigation can achieve 90–95% efficiency under suitable conditions. That figure depends on pressure, filtration, layout, and maintenance. I learned this after clogged emitters left one tomato bed dry. Small mistakes become visible quickly.

Start with a water source, pressure gauge, filter, mainline, and adjustable emitters. Measure the garden before buying tubing. Place emitters near each plant’s expected root area, then check the soil by hand. A damp surface can hide dry soil below.

Use a timer only after observing how fast the ground absorbs water. Water slowly until moisture reaches the root depth, without creating runoff. Spacing should reflect plant size and soil type.

Sandy soil Sandy soil usually needs shorter, more frequent applications.

Clay soil Clay soil needs slower flow and longer pauses.

Flush the lines at the ends every few weeks. Clean the filter regularly, especially after repairs or dusty weather. I would not promise 95% efficiency in every yard. Wind, leaks, uneven pressure, and poor design reduce performance.

Keep a simple log of watering time, weather, and soil moisture. Adjust one setting at a time. That makes problems easier to trace. A reliable system is not forgotten; it is checked.

Build the Water Source: Regulate Drip Lines to 15–30 PSI

How to Set Up a DIY Irrigation System?

Build the Water Source: Regulate Drip Lines to 15–30 PSI

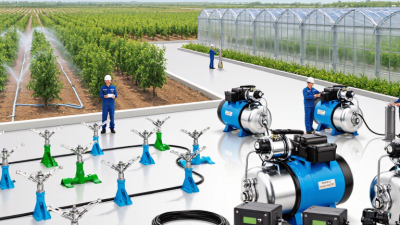
Start at the water source with a shutoff valve, filter, pressure regulator, and pressure gauge. The filter catches grit before it reaches narrow drip passages. Set the regulator between 15 and 30 PSI, unless your tubing or emitters require a different range. Check the equipment instructions carefully. More pressure is not better. Excess pressure can loosen fittings, split tubing, or create uneven watering.

I learned this after setting my first system too high. The nearest emitters sprayed, while the farthest plants stayed dry. I reduced the pressure and measured the end of each line. A gauge at the source helps, but the pressure can change along long runs. Keep lines reasonably short, and flush them before connecting the end caps. Watch for cloudy water, blocked outlets, and wet patches around fittings.

Tips: Run the system for ten minutes and inspect every connection. Place a small container under several emitters to compare output. If the farthest container collects much less water, shorten the line or divide the zone. Recheck pressure after the filter becomes dirty. I sometimes forget this step, and the plants show it before I do. Use clean, secure connections, and avoid burying the tubing until the system performs evenly.

How to Set Up a DIY Irrigation System? — Build the Water Source: Regulate Drip Lines to 15–30 PSI
System Element Recommended Specification Purpose Installation Guidance Important Notes
Water Source Outdoor tap, storage tank, or rainwater reservoir with a dependable supply Provides water for the irrigation network Confirm the source can supply the required flow before installing the distribution lines. A typical residential tap may provide more pressure than drip tubing can safely use, so pressure regulation is normally required.
Source Shut-Off Valve One manual isolation valve at the beginning of the system Allows the entire irrigation system to be turned off for maintenance Install it directly after the tap or pump outlet, where it is easy to reach. Use a valve that matches the pipe connection size and remains accessible after installation.
Backflow Protection Approved backflow-prevention device suitable for the water connection Helps prevent irrigation water from flowing back into the household water supply Place it upstream of the filter, pressure regulator, and irrigation lines. Local plumbing rules may specify the required device and installation position, especially for potable-water connections.
Sediment Filter Fine irrigation filter; commonly 120 mesh, approximately 130 microns, for drip systems Captures sand, rust, and other particles that can clog emitters Install after the backflow device and before the pressure regulator or drip lines, following the filter’s flow-direction arrow. Clean the filter when flow decreases or pressure loss increases. Water with heavy sediment may require more frequent cleaning.
Pressure Regulator Set to 15–30 PSI Reduces incoming pressure to a level suitable for drip tubing and emitters Install downstream of the filter and adjust or select the regulator according to the drip-line requirements. Use a pressure gauge to verify the actual operating pressure. Do not assume the source pressure is suitable.
Pressure Gauge Gauge with a readable range that includes 0–60 PSI Confirms that the regulated pressure remains within the target range Install near the outlet of the pressure regulator, preferably at the start of the distribution manifold. Check pressure while water is flowing; static pressure can be higher than operating pressure.
Main Supply Pipe UV-resistant polyethylene tubing sized for the system flow Carries regulated water from the source to the irrigation zones Keep the run as direct as practical and use compatible fittings to reduce unnecessary restriction. Long runs, small tubing, elevation changes, and many fittings can cause pressure loss before water reaches the drip lines.
Zone Manifold One outlet valve for each irrigation zone Separates areas with different watering schedules or flow requirements Connect the manifold after the pressure regulator and label each outlet, such as vegetable beds, containers, or shrubs. Running fewer zones at one time can help maintain stable pressure and adequate flow.
Drip Distribution Lines Pressure-compensating or standard drip tubing rated for regulated low-pressure operation Delivers water close to plant roots with reduced evaporation and runoff Lay lines along plant rows, secure them with stakes, and flush the ends before closing them. Follow the tubing manufacturer’s maximum run length and emitter-spacing limits; these vary by tubing diameter and emitter flow.
Emitter Flow Common residential values: 0.5–2.0 gallons per hour per emitter Controls the amount of water delivered to each plant Select flow according to plant size, soil type, spacing, and local climate rather than using the same emitter everywhere. Clay soils generally require slower application or wider spacing to reduce pooling, while sandy soils may need more frequent watering.
End Flush Points Removable end caps, flush valves, or figure-eight closures Allow debris to be flushed from the drip lines Place a flush point at the end of every lateral line and open it briefly during initial setup and periodic maintenance. Flush until the water runs clear, then close the line while the system is operating at the regulated pressure.
Pressure Verification Test 15–30 PSI while the system is running Confirms that drip lines receive suitable operating pressure Open the zone valve, allow water to flow, and read the gauge at the regulated outlet. If pressure is below the target, check for insufficient supply, clogged filtration, excessive line length, leaks, or too many open zones.
Leak and Uniformity Check Inspect every connection and compare flow from representative emitters Detects leaks, blocked emitters, and uneven watering Run each zone for several minutes and examine fittings, tubing, end points, and emitters. Repair leaks and replace blocked components before setting an automatic watering schedule.

Install and Zone the Network with 0.5–2 GPH Emitters

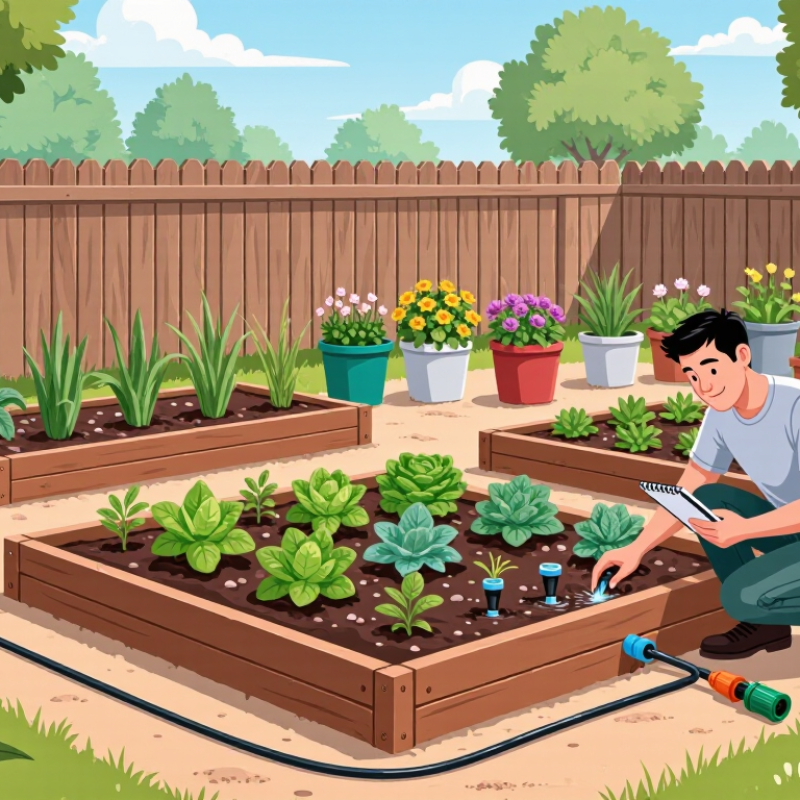
A DIY irrigation system starts with a careful map of your garden. Mark each plant bed, water source, slope, and hose route. Group plants with similar moisture needs into the same zone. Vegetables may need more frequent watering than established shrubs. Keep those demands separate.

Install a filter and pressure regulator before the mainline. Clean water protects small emitter openings. Use 0.5 GPH emitters for delicate plants or sandy soil, where slow flow reduces runoff. Choose 1–2 GPH emitters for larger plants, dense soil, or deeper root zones. Place two emitters around a young tree, not directly against its trunk. Secure the tubing with stakes, especially near walkways and sharp corners.

Start each zone with its own valve or shutoff point. Keep tubing lengths reasonable, because distant emitters may receive less water. After connecting the network, flush the open tube ends for several minutes. Then close them and test every emitter. Look for weak streams, puddles, or dry patches. A one-hour test reveals useful details: a 1 GPH emitter delivers roughly one gallon during that period. I once assumed equal spacing would work everywhere. It did not. One bed needed closer emitters, while another stayed too wet. Adjust placement after observing the soil, not just the timer. Check filters, tubing, and emitters regularly, especially after pruning or heavy rain.

Test and Maintain the System: Flush Filters Every 2–4 Weeks

A DIY irrigation system can save water, but only when its small parts receive regular care. Filters protect emitters from sand, rust, and organic debris. Without cleaning, water flow becomes uneven, and some plants may slowly dry out.

Flush the filter every two to four weeks during the watering season. Use a calendar reminder, because visual checks are not always reliable. Turn off the water supply before opening the filter housing. Place a shallow container underneath.

Remove the screen and rinse it with clean water. A soft brush can loosen stubborn particles. Avoid sharp tools, which may damage the mesh.

Check the filter seal before closing it. A twisted gasket can cause a slow leak. Restore the water gradually, then watch the joints for several minutes. Look for weak spray patterns, clogged emitters, or muddy water near the outlet. These signs may require earlier cleaning, especially after heavy rain, construction, or using a storage tank.

I once waited nearly a month because the system still appeared to work. That was a mistake. Several plants received less water than expected. Since then, I inspect one emitter in each irrigation zone after flushing. Keep a simple maintenance note with the date, water pressure, and unusual findings. The schedule may need adjustment. Clean water may allow a longer interval, while dusty conditions may demand weekly attention.