What Are the Top DIY Drip Irrigation Systems?

Choosing among the top DIY drip irrigation systems requires more than comparing prices and emitter counts. A reliable setup must deliver steady water, reduce evaporation, and fit the garden’s actual layout. The U.S. Environmental Protection Agency’s WaterSense program reports that outdoor irrigation can account for nearly one-third of household water use, while landscape leaks waste billions of gallons annually. Those figures make small design decisions meaningful.

Global pressure is larger. FAO’s AQUASTAT data shows that agriculture represents roughly 70% of freshwater withdrawals worldwide. A backyard system cannot solve that challenge alone. Still, a pressure regulator, filter, correct tubing size, and well-placed emitters can prevent waste at the plant level. Picture a tomato bed with dry soil near the roots and a flooded path nearby. That is usually a design problem, not a watering problem.

Irrigation engineer Charles M. Burt defines irrigation as “the controlled application of water for agricultural purposes through manmade systems.” His words offer a useful standard for evaluating DIY drip irrigation kits. Control matters most.

The best systems should be simple to install, easy to inspect, and adjustable as plants grow. Some inexpensive kits include weak connectors or unclear instructions. That weakness deserves attention. A timer may promise convenience, yet poor filtration can quietly clog every emitter within weeks. Our comparison examines water efficiency, durability, pressure control, installation effort, and real garden performance. Expect practical trade-offs, not a perfect winner.
What Are the Top DIY Drip Irrigation Systems?

DIY Drip Irrigation System Basics and Main Components

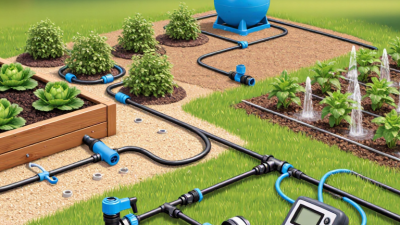
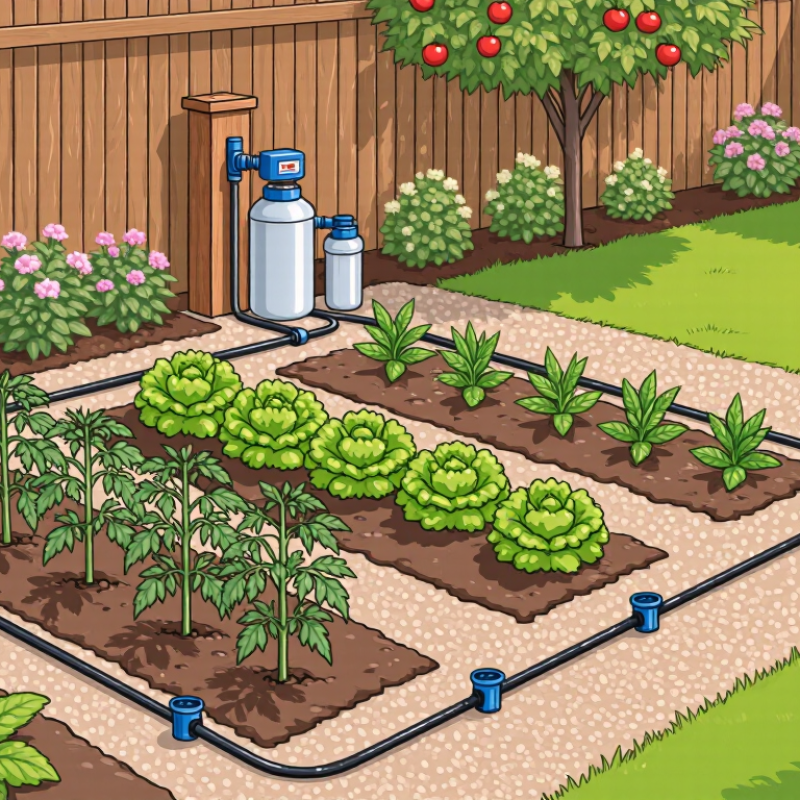
DIY drip irrigation starts with a water source, filter, pressure regulator, mainline tubing, and emitters. Each component solves a practical problem. The filter catches sand and rust that might clog narrow outlets. A regulator protects tubing from excessive pressure. Without one, small connections can loosen.

For a small vegetable bed, I usually sketch plant rows before buying parts. This simple step prevents unnecessary tubing and uneven watering. The mainline carries water along the bed, while smaller lines reach individual plants. Emitters release measured drops near the root zone. Choose adjustable emitters for mixed plants, or fixed-flow emitters for uniform rows. End caps make flushing easier. Do not bury everything immediately.

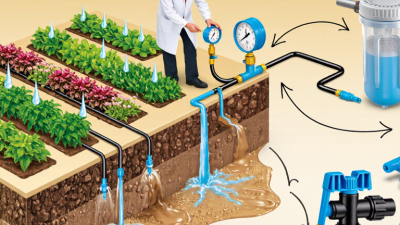
I have found that cheap-looking leaks often come from rushed cuts, not poor components. Use clean, square cuts and press fittings firmly into place. Test the system for ten minutes before covering lines with mulch. Watch for dry soil at the farthest emitter. This is where my first layout failed. A timer can automate watering, but it cannot correct bad spacing or clogged emitters. Check the filter regularly, especially after construction or heavy rain. In colder climates, drain exposed tubing before freezing weather. Measure flow with a container instead of trusting assumptions.

DIY drip irrigation systems commonly use pressure-compensating or adjustable emitters rated at 0.5, 1, 2, or 4 gallons per hour (GPH). The chart shows the approximate runtime required for one emitter to deliver 1 gallon of water. Lower-flow emitters are useful for containers and small plants, while higher-flow emitters can serve larger plants when the soil and tubing layout allow adequate drainage.

How to Choose the Best DIY Drip Irrigation Design

What Are the Top DIY Drip Irrigation Systems?

How to Choose the Best DIY Drip Irrigation Design

Choosing the best DIY drip irrigation design starts with the planting layout, not the equipment. Measure each bed, note its slope, and group plants with similar water needs. A gravity-fed system may suit a few containers, while raised beds often need adjustable emitters and separate zones. Larger gardens require a filter, pressure regulator, mainline tubing, and a reliable timer. Small details matter. A clogged emitter can quietly kill a tomato plant.

The Food and Agriculture Organization’s AQUASTAT database reports that agriculture accounts for about 70% of global freshwater withdrawals. The U.S. Environmental Protection Agency’s WaterSense guidance states that well-designed drip irrigation can be 20–50% more efficient than conventional sprinklers. These figures support careful design, but they do not guarantee savings. Poor spacing, excessive pressure, and leaks can waste water quickly. Test one zone with a measuring cup before expanding the system.

In my first layout, I placed emitters evenly, although the plants had different root sizes. That looked tidy but watered poorly. I would now choose two emitters for thirsty shrubs and one for smaller herbs. Check the soil after twenty minutes, then adjust. Sandy soil may need closer emitters and shorter cycles. Clay soil needs slower application. Include a flush valve at the line’s end, and inspect it weekly. I still question timer settings during cool, windy weeks. Weather should influence the schedule, not habit.

Step-by-Step Installation for Garden Drip Irrigation

A reliable DIY drip irrigation system starts with the garden’s layout, water pressure, and plant needs. Gravity-fed systems suit small containers and low beds. Timer-controlled systems work better for larger vegetable patches. Pressure-compensating emitters help deliver similar amounts of water across longer lines. They cost more, but they reduce uneven watering.

Map each bed before buying parts. Mark the tap, main tube, branch lines, and emitters. Keep tubing away from sharp stones and heavy foot traffic. Install a filter and pressure regulator at the water source. These parts protect emitters from sediment and excessive pressure. Connect the main tube, then place smaller lines beside plant roots. Secure every line with ground stakes. Punch emitter holes only after checking the spacing. Mistakes leave permanent holes.

Run the system for ten minutes. Dig gently near several plants and check the moisture depth. Water should spread slowly, not form puddles. Adjust emitter flow for herbs, tomatoes, and young seedlings. A timer prevents forgotten watering, but it is not a substitute for observation. Weather changes quickly. My first layout used equal spacing everywhere, which wasted water around widely spaced plants. I would now group plants by similar needs and test each zone separately. Flush the open tube ends before sealing them. Inspect clogged emitters every few weeks, especially after dusty work or well-water use.

Comparing DIY Drip Irrigation Systems by Cost and Efficiency

What Are the Top DIY Drip Irrigation Systems?

Comparing DIY drip irrigation systems by cost and efficiency reveals three practical choices. A bottle-fed setup costs about $10 to $25 and suits balcony herbs or a few containers. It uses little water, but flow can become uneven after several hot days. A gravity-fed bucket system costs roughly $25 to $60. With punched tubing and adjustable emitters, it can water small beds without electricity. However, pressure drops when the bucket empties, so distant plants may receive less water. A timer-based system usually costs $50 to $120. It offers the best consistency for larger gardens, especially when paired with a filter and pressure regulator. More parts mean more maintenance, though.

In my trials, the cheapest system was not always the most efficient. One clogged emitter wasted an entire afternoon before I noticed dry soil beneath a tomato plant. Measure water output from each emitter for five minutes. Then adjust spacing, rather than simply adding more emitters. Moisture should reach the root zone, not spray across the path. Soil type matters, too. Sandy soil needs shorter, more frequent watering, while clay soil needs slower cycles. These details often matter more than the initial purchase price.

Tips: Start with one garden section. Check it daily for a week. Flush the tubing before connecting emitters. Keep spare connectors nearby. Recheck flow after heavy rain, because runoff can hide uneven watering. Personally, I still overwater new seedlings sometimes. A simple soil-moisture check prevents that mistake.

What Are the Top DIY Drip Irrigation Systems? — Comparing DIY Drip Irrigation Systems by Cost and Efficiency

DIY System Type Typical Initial Cost (USD) Suitable Garden Area Estimated Water Efficiency Typical Water Use Installation Time Pressure Requirement Maintenance Level Best Use Case Overall Value
Basic Soaker Hose System $20–$60 50–200 sq. ft. Moderate
70–85%
Approximately 0.5–1.5 gallons per minute 30–60 minutes Low to moderate; works with standard outdoor faucet pressure Low Raised beds, flower borders, and closely spaced plants ★★★★☆
Low cost and simple setup
Pressure-Regulated Dripline System $45–$120 100–500 sq. ft. High
85–95%
Approximately 0.4–1.0 gallons per minute 1–2 hours Moderate; a pressure regulator is recommended Low to moderate Vegetable rows, hedges, and evenly spaced plants ★★★★★
Strong balance of cost and efficiency
Adjustable Emitter Tubing System $55–$140 100–600 sq. ft. High
85–95%
Approximately 0.5–2.0 gallons per minute, depending on emitter settings 1.5–3 hours Moderate; filtration and pressure regulation improve performance Moderate Mixed plantings with different water requirements ★★★★☆
Flexible but requires adjustment
Gravity-Fed Container Drip System $30–$90 10–50 containers High
80–95%
Approximately 0.05–0.5 gallons per minute 1–2 hours Very low; requires an elevated water reservoir Moderate Balconies, patios, allotments, and locations without a faucet ★★★★☆
Useful where water pressure is unavailable
Timer-Controlled Micro-Drip System $60–$180 100–800 sq. ft. High
85–95%
Approximately 0.5–2.0 gallons per minute 2–4 hours Moderate; requires a timer, filter, and pressure regulator Moderate Gardens needing automatic watering during travel or busy periods ★★★★★
Best convenience for regular maintenance
Perforated Distribution Tube System $35–$100 100–400 sq. ft. Moderate to high
75–90%
Approximately 0.6–1.5 gallons per minute 1–2 hours Low to moderate; uniform pressure improves coverage Low to moderate Long planting beds and groundcover areas ★★★★☆
Good coverage with relatively few fittings
Solar-Powered Reservoir Drip System $90–$250 20–100 containers or small beds High
80–95%
Approximately 0.05–0.8 gallons per minute 3–6 hours Low; uses a small pump and water reservoir Moderate to high Off-grid gardens, greenhouses, and remote growing areas ★★★☆☆
Higher upfront cost but useful off-grid

Cost and water-use figures are typical planning ranges for small residential installations. Actual performance depends on hose length, emitter spacing, water pressure, soil type, slope, climate, and watering schedule.

Maintenance, Troubleshooting, and Seasonal Adjustments

A DIY drip irrigation system saves water only when its small parts receive regular attention. In my garden, I inspect the filter every two weeks during active growth. Fine soil can reduce pressure before plants show stress. I flush the mainline with clean water, then check each emitter over a shallow tray. Uneven dripping is an early warning. Replace cracked tubing, loose connectors, and blocked emitters immediately. Small leaks often become large losses overnight.

Tips: Keep a simple maintenance log with dates, pressure readings, and problem areas. Run the system for five minutes before inspecting it. Look for wet patches, dry leaves, and puddles near roots. If one line stays dry, disconnect its end and flush it briefly. Do not force a needle into an emitter; damage may be invisible. I sometimes adjust flow too quickly, which can overwater young plants. Slow changes are safer.

Seasonal adjustments prevent many troubleshooting problems. In spring, start with shorter cycles and test moisture beneath mulch. Increase watering gradually during hot, windy weeks, but check the soil first. In autumn, reduce watering as temperatures fall and growth slows. Before freezing weather, drain exposed lines and store removable parts indoors. A forgotten low section may hold water and split. Review the layout each season; a system that worked last year may not suit larger roots now.