A dry tomato bed can look healthy at dawn, then wilt by late afternoon. The difference often comes down to where water lands, how steadily it flows, and whether the system fits the garden. Garden drip irrigation sends water through tubing and emitters near plant roots, rather than spraying every leaf and path. That precision matters as water supplies face growing pressure. The UN World Water Development Report 2023, drawing on FAO data, estimates that agriculture accounts for roughly 70% of global freshwater withdrawals.
The market is expanding, but growth alone does not prove that a kit will perform well in your yard. Grand View Research’s 2024 micro-irrigation market report tracks rising demand for efficient irrigation, while leaving buyers to compare practical details. Emitter flow rates, filter quality, pressure regulation, tubing durability, and replacement-part availability can matter more than a large advertised coverage area. A low-cost kit may suit six raised beds; it may disappoint across a sloped plot with uneven water pressure.
Fit matters. So does maintenance. This guide compares ten garden drip irrigation systems for different layouts, budgets, and experience levels. We consider setup effort, expandability, included components, and the clarity of product instructions. These comparisons are a starting point, not a substitute for checking local water pressure or a system’s specifications. A small caveat: even a well-designed kit can clog when filters are neglected. Choose for your actual garden, not the neat diagram on the box.
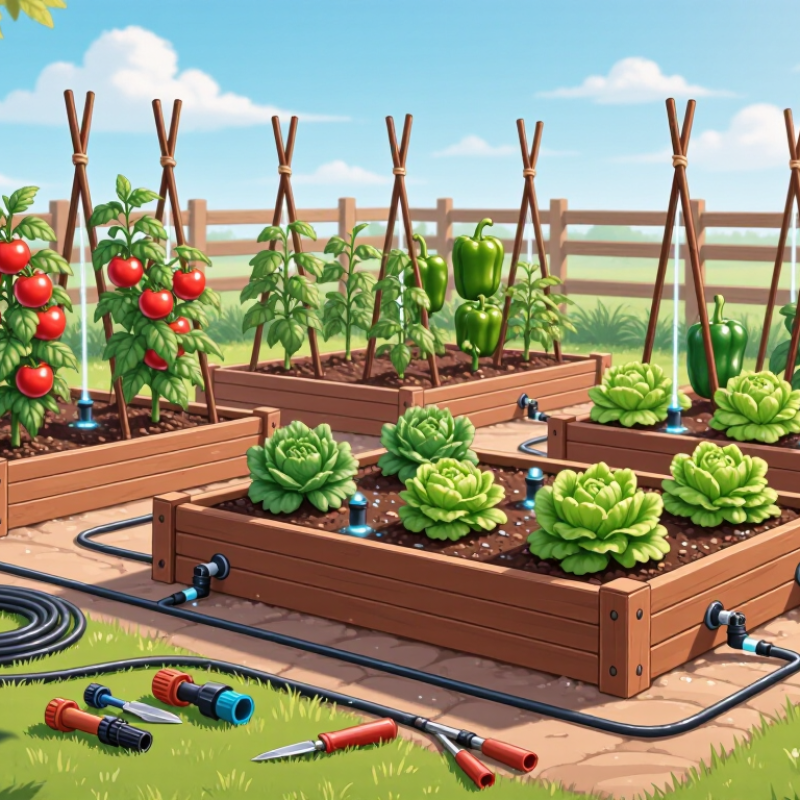
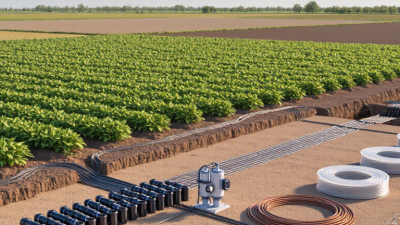
A garden drip irrigation system carries water through narrow tubing and releases it slowly beside plant roots. A basic setup usually includes a tap connection, filter, pressure regulator, mainline, and small emitters. The filter catches grit that could clog the outlets. Water reaches the soil in small, localized doses rather than spraying across paths and leaves.
The U.S. Environmental Protection Agency’s WaterSense report, Outdoor Water Use in the United States, estimates that Americans use nearly 9 billion gallons of water outdoors each day. It also says up to 50 percent may be lost through inefficient watering. Drip systems can reduce overspray, but savings depend on proper layout and timing. Small leaks matter.
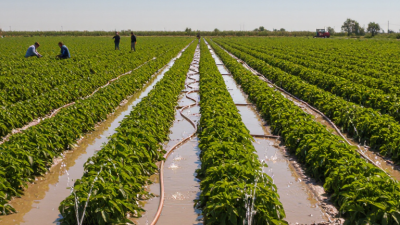
In a raised bed, tubing can run beside rows of tomatoes, with emitters near each stem. Check that the soil gets damp several inches down, not just on the surface. Sandy soil may need closer emitter spacing than clay, where water spreads more slowly. Not magic, though. Clogged outlets, excessive pressure, or a timer set too long can still waste water. Check the filter and observe the bed after watering; real soil rarely behaves exactly like a diagram.
A garden drip irrigation system has several working parts. The main supply line carries water from a tap or rain barrel to smaller tubing. A filter helps catch grit that could block narrow passages. A pressure regulator reduces strong water pressure, while connectors and end caps direct and contain the flow. Emitters release water slowly near plant roots. Small parts matter. A kinked tube or loose connector can leave one bed dry while another stays wet.
Common system types include soaker hoses, drip lines with built-in emitters, and kits with separate microtubing and adjustable drippers. Soaker hoses suit straight, closely planted rows. Built-in emitter lines offer even spacing for beds, while individual drippers allow more control around pots or widely spaced shrubs. I have found that adjustable drippers seem convenient, but they can be harder to inspect across a large garden. No layout fits every bed.
Tips: Flush the lines before planting, then check emitters while water is running. Look for puddles, dry soil, and leaks near connectors. Check it weekly. Adjust watering as plants grow; a setting that worked for seedlings may not suit mature roots.
This chart shows common nominal flow rates for point-source drip emitters. Actual flow depends on water pressure and emitter design. Typical systems may use inline drip tubing, point-source emitters, or micro-sprinklers, with a filter, pressure regulator, tubing, and connectors selected to suit the layout and water source.
A useful comparison of garden drip irrigation systems starts with the garden, not the kit. Measure each bed and note plant spacing, slope, and distance from the water source. A vegetable row with closely spaced seedlings needs different tubing and emitters than a few widely spaced shrubs. Compare the included tubing length, connector count, and emitter options against that sketch. Small plots vary.
Check whether the system includes a filter and pressure regulator, or whether these must be purchased separately. Filters help limit clogging from sediment, while steady pressure supports more even watering. Look for clear instructions and connectors that fit your available faucet or hose. A low price can be misleading if key parts are missing.
Consider how easily the layout can change as plants grow. Removable emitters and extra connectors can make adjustments simpler, though they may add cost. Run the system briefly and inspect the soil near the first and last plants; uneven moisture can reveal pressure or layout problems. That matters. Also estimate how often filters need cleaning and whether replacement parts are easy to find. No setup stays perfect through every season, and even a careful plan may need a few adjustments after the first week.
| System Type | Typical Components | Typical Water Delivery | Best Suited For | Key Evaluation Points | Main Limitations |
|---|---|---|---|---|---|
| Faucet-fed starter kit | Hose-thread connection, filter, pressure regulator, main tubing, fittings, and emitters | Often uses 1/2-inch main tubing with 1/4-inch distribution tubing; emitter flow rates commonly range from about 0.5 to 2 gallons per hour (GPH) | Small raised beds, patio gardens, and first-time installations | Check that the kit includes a filter and a regulator suited to its components; confirm the tubing length and number of outlets cover the planned layout | Included tubing and fittings may not be enough for larger gardens; layouts may need additional zones |
| Inline emitter dripline | Flexible tubing with built-in emitters at regular intervals, plus a filter, regulator, and connectors | Emitter spacing and flow vary by product; common spacing options include roughly 6 to 24 inches, with flow often specified per emitter or per length | Vegetable rows, hedges, and long, evenly spaced planting beds | Match emitter spacing to plant spacing; check the specified operating pressure, maximum run length, and whether the line can be flushed | Less adaptable where plants are irregularly spaced; a damaged built-in emitter can be harder to replace individually |
| Point-source emitter system | Main tubing, small distribution lines, and individual emitters placed near selected plants | Common emitter ratings include approximately 0.5, 1, and 2 GPH; actual delivery depends on pressure and emitter design | Mixed plantings, shrubs, trees, and beds with uneven plant spacing | Look for removable or flushable emitters and check whether the design compensates for pressure differences across the line | Requires more placement and maintenance than evenly spaced dripline; emitters can clog if filtration is inadequate |
| Quarter-inch emitter tubing | Small-diameter tubing with pre-installed emitters, branching from a larger supply line | Emitter spacing and flow are product-specific; commonly used for short branches to individual plants or containers | Container groupings, narrow beds, and compact planting areas | Check the tubing's recommended run length and connection compatibility; secure the line to prevent kinks or movement | Small tubing is more vulnerable to kinking and blockage and is not generally suited to long supply runs |
| Adjustable-emitter system | Supply tubing with adjustable or multi-outlet emitters and distribution stakes or microtubing | Output can be adjusted within the emitter's specified range; delivered flow may vary with pressure and adjustment setting | Container gardens and mixed plantings with different watering needs | Compare the adjustment range and number of outlets per emitter; check whether individual outlets can be shut off | Settings can be changed accidentally, and small outlet passages need routine inspection for clogging |
| Gravity-fed drip system | Elevated water reservoir, filter, low-pressure-compatible tubing, and suitable emitters or dripline | Flow depends on the water-level height and system design; use components specifically rated for low-pressure operation | Gardens without a pressurized faucet, remote plots, or simple small-scale watering | Verify the minimum pressure requirement, reservoir capacity, filter arrangement, and elevation needed for the chosen components | Available pressure is limited and changes as the reservoir empties; standard pressure-dependent emitters may not work properly |
| Timer-controlled multi-zone system | Timer, filter, pressure regulator, zone valves or manifold, and separate drip lines | Each zone operates according to its components and flow demand; zones allow separate watering schedules | Larger gardens or areas with plants that need different watering schedules | Check the timer's zone count, power source, weather resistance, and compatibility with the water source and valves | More components increase setup complexity; batteries, valves, and schedules require periodic checking |
| Micro-spray and drip combination | Drip tubing combined with low-volume micro-sprayers, connectors, filter, and pressure control | Spray patterns and flow rates vary by nozzle; drip emitters deliver water locally while micro-sprayers wet a wider area | Mixed beds where some plants benefit from localized soil watering and others need broader surface coverage | Check spray radius, flow rate, and whether the two outlet types can operate at the same pressure in a zone | Spray can be affected by wind and may wet foliage or paths; the system may use more water than point-source drip |
| Subsurface dripline | Buried dripline, filter, pressure control, flush points, and a layout designed for underground installation | Built-in emitter spacing and flow are specified by the product; installation depth and spacing depend on soil and crop | Established beds or rows where surface tubing would be in the way | Check filtration requirements, flushing access, installation depth guidance, and measures to limit root intrusion | Leaks and blockages are harder to see; soil type and installation quality strongly affect water distribution |
| Container manifold system | Central manifold, small distribution lines, adjustable or fixed emitters, stakes, and a hose or faucet connection | Flow is set by the chosen emitters; outlets can be routed separately to individual pots or grouped containers | Balconies, greenhouses, and collections of pots or grow bags | Count the outlets, confirm the tubing reaches each container, and check that the manifold can be expanded or capped as needed | Containers can dry at different rates; lines may need repositioning as plants grow or pots are moved |
Buying note: Flow rates, emitter spacing, pressure limits, and compatible fittings vary by product. Treat the figures above as common examples rather than guaranteed specifications, and follow the selected system's instructions. A filter and appropriate pressure control are important for many faucet-fed drip layouts.
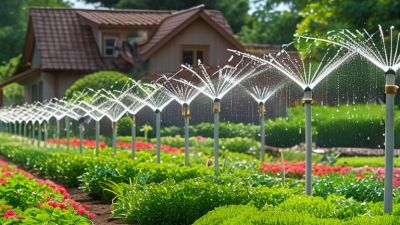
A small balcony garden often needs a container drip kit with thin tubing and adjustable emitters. Raised beds suit modular lines that can follow each row, while long vegetable plots benefit from pressure-compensating emitters for more even watering. For hanging baskets, choose lightweight micro-tubing that reaches each pot. A gravity-fed system can work where no tap is nearby, but it needs enough height to maintain flow. For sloped beds, pressure-compensating lines help limit uneven delivery. Adjustable emitters suit mixed plant sizes, and a soaker-drip hybrid can cover dense borders. Orchards may need wider-spaced emitters around young trees. Greenhouses benefit from compact, easy-to-clean layouts. Timer-ready systems help busy gardeners, though timers cannot fix poor placement. There are ten useful types here, but none fits every garden.
Tips: Test one line before installing the whole system. Check the filter and flush tubing regularly. A clogged emitter can leave one plant thirsty while its neighbors look fine.
Measure the garden and note the tap’s water pressure before buying. Keep tubing runs as short and direct as practical. I have seen neat layouts become awkward when beds change, so leave a little slack. Too much slack can kink, though. Adjust flow after checking soil beneath the surface, not just leaves at midday.
A reliable drip system begins with the garden layout, not the package. Sketch beds, pots, and hose routes, then group plants with similar watering needs. A tomato row may share one line, while a large container needs a separate emitter. Measure the tap’s pressure and flow before choosing tubing; long runs can water unevenly. Small details matter. The U.S. EPA’s WaterSense “Watering Wisely” guidance estimates drip irrigation delivers about 90% of applied water to plants, compared with 50–70% for sprinklers. That figure is a useful benchmark, not a guarantee: poor layout, leaks, or clogged emitters can reduce performance.
For setup, place a filter and pressure regulator after the tap, then run main tubing along the bed edges. Punch emitter holes near root zones, not against plant stems. Flush the lines before attaching end caps, and check each emitter while the water runs. Use a timer only after confirming the soil drains well; fixed schedules may overwater after rain or during cool spells. A simple moisture check with a finger can catch that. I’d rather adjust a few emitters after observing the bed than assume the first layout is perfect. Recheck connections after the first week, since small leaks are easy to miss beneath mulch.